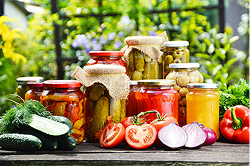
The basic canning process involves preparing jars and food, filling jars leaving headspace, removing air bubbles, cleaning rims, applying lids/bands fingertip tight, processing in a boiling water canner or pressure canner for a specific time, cooling undisturbed for 12-24 hours, checking seals, and storing in a cool, dark place. This process uses heat to destroy microorganisms and create a vacuum seal, preserving food safely.
General Steps for Home Canning
- Prepare Jars & Equipment: Wash jars in hot, soapy water, inspect for chips, and preheat jars (e.g., in hot water) to prevent breakage.
- Prepare Food: Wash, peel, and chop ingredients according to a tested recipe.
- Pack Jars: Fill hot jars with prepared food, leaving the recommended headspace (space between food and rim).
- Remove Air & Clean: Use a non-metallic utensil to remove trapped air bubbles, then wipe jar rims and threads clean with a damp cloth.
- Apply Lids: Center new lids on jars and screw bands on fingertip-tight (snug but not forced).
- Process Jars:
- Water Bath: Place jars in a canner with enough simmering water to cover them by at least 1 inch. Bring to a boil, then time according to recipe (for high-acid foods).
- Pressure Canning: Place jars in a pressure canner with water, exhaust steam for 10 mins, then bring to correct pressure and time (for low-acid foods).
- Cool: Remove jars carefully and place on a towel or rack, leaving space between them, and let them sit undisturbed for 12-24 hours.
- Check Seals: After cooling, press the lid center; it should be concave and not bounce. Remove bands.
- Store: Label and store jars in a cool, dark, dry place.